Practical guide on how to implement a chatbot in your business
Cristian Gómez
@crisgomz95

More and more businesses of all sizes are automating their processes to stay competitive. One of these strategies is integrating chatbots into customer support channels to improve user satisfaction and experience. If you're wondering how to integrate a chatbot into your website and enhance the interaction between your customers and your business, you're in the right place. In this blog post, we'll guide you step-by-step to help you achieve this quickly and easily with VictorIA, our solution for creating intelligent and customized chatbots.
What is a chatbot?
A chatbot is an intelligent assistant capable of automatically answering questions in a specific domain using a knowledge base. Previously, chatbots were designed based on a set of rules to answer predefined questions. However, with the advent of Artificial Intelligence, chatbots are now fully autonomous and operate according to specific guidelines. Essentially, they behave and respond almost like a human.
Benefits of implementing an intelligent chatbot
Incorporating an intelligent chatbot into your business can transform the way your customers interact with your support, documentation, or any type of information you provide. Beyond answering questions, these virtual assistants enhance the user experience, optimize resources, and increase operational efficiency.
24/7 Support
One of the greatest advantages of implementing a chatbot in your business is providing customers with immediate, quality responses, which is a significant satisfaction driver. We're increasingly unwilling to wait and want instant answers to our questions. Additionally, we prefer conversational interactions rather than navigating options, like when calling a hotline. An intelligent chatbot acts as if it were human, helping customers quickly find the information they need by conversing with them.
Cost reduction
The ability of a chatbot to handle multiple conversations simultaneously reduces the need to hire additional staff, even during periods of high demand. This also allows staff to focus on higher-impact tasks, such as marketing strategies, developing new products or services, etc.
How to implement a chatbot for your business?
VictorIA can help you create intelligent conversational assistants in just a few minutes. VictorIA is a solution that enables quick and easy creation of intelligent, customized chatbots that answer questions aligned with your business content. Its design supports working with various types of data, regardless of their format or structure, facilitating the integration of any business information. Furthermore, VictorIA is built with a user-centric approach, offering a highly customizable component ready to integrate into any website. This makes it possible for anyone, with minimal effort, to connect a chatbot to their data sources and integrate it into their platform quickly.
Chatbot configuration
We aim to make the process as simple as possible. That's why VictorIA is primarily designed with a guided approach. This means there's a structured order for creating and configuring a chatbot. This design ensures you can customize an assistant yourself with ease and in no time, without compromising your specific use case needs. Continue reading this blog to learn the details of implementing a chatbot with VictorIA.
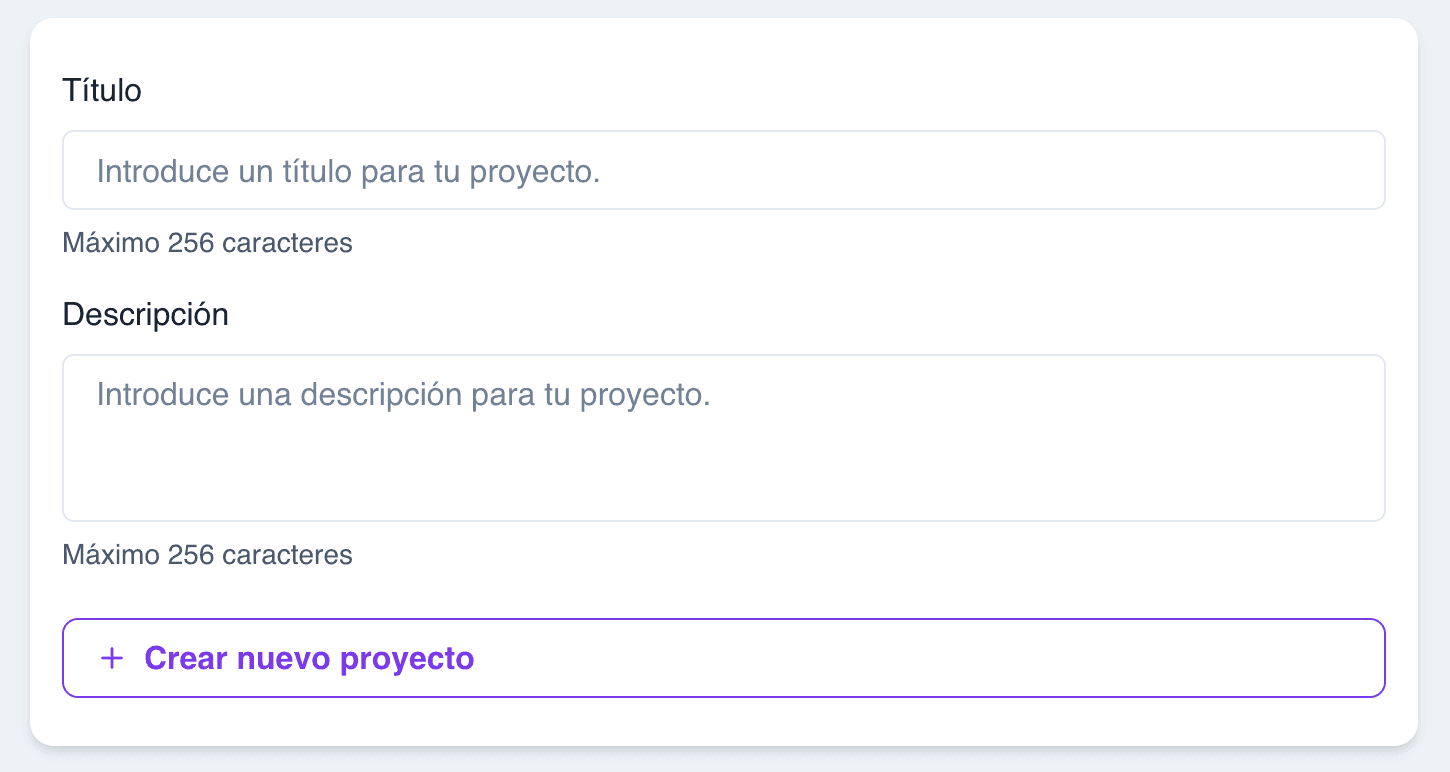
Create your project
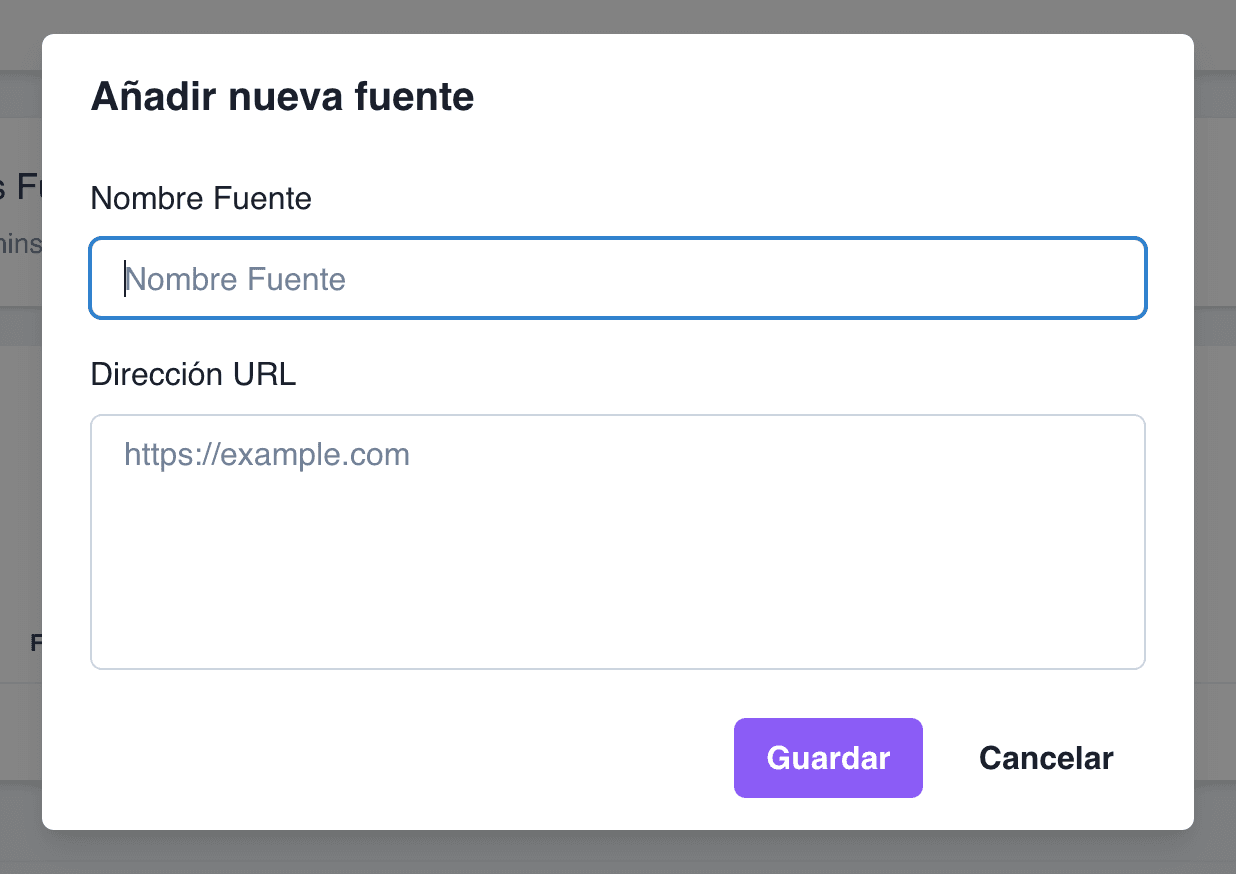
The first step is creating a project. This is the entity that encompasses the entire chatbot configuration, such as its knowledge base, AI model, behavior settings, etc. You'll need to provide a title and a brief description, especially since you might have multiple projects and want to distinguish one from another.
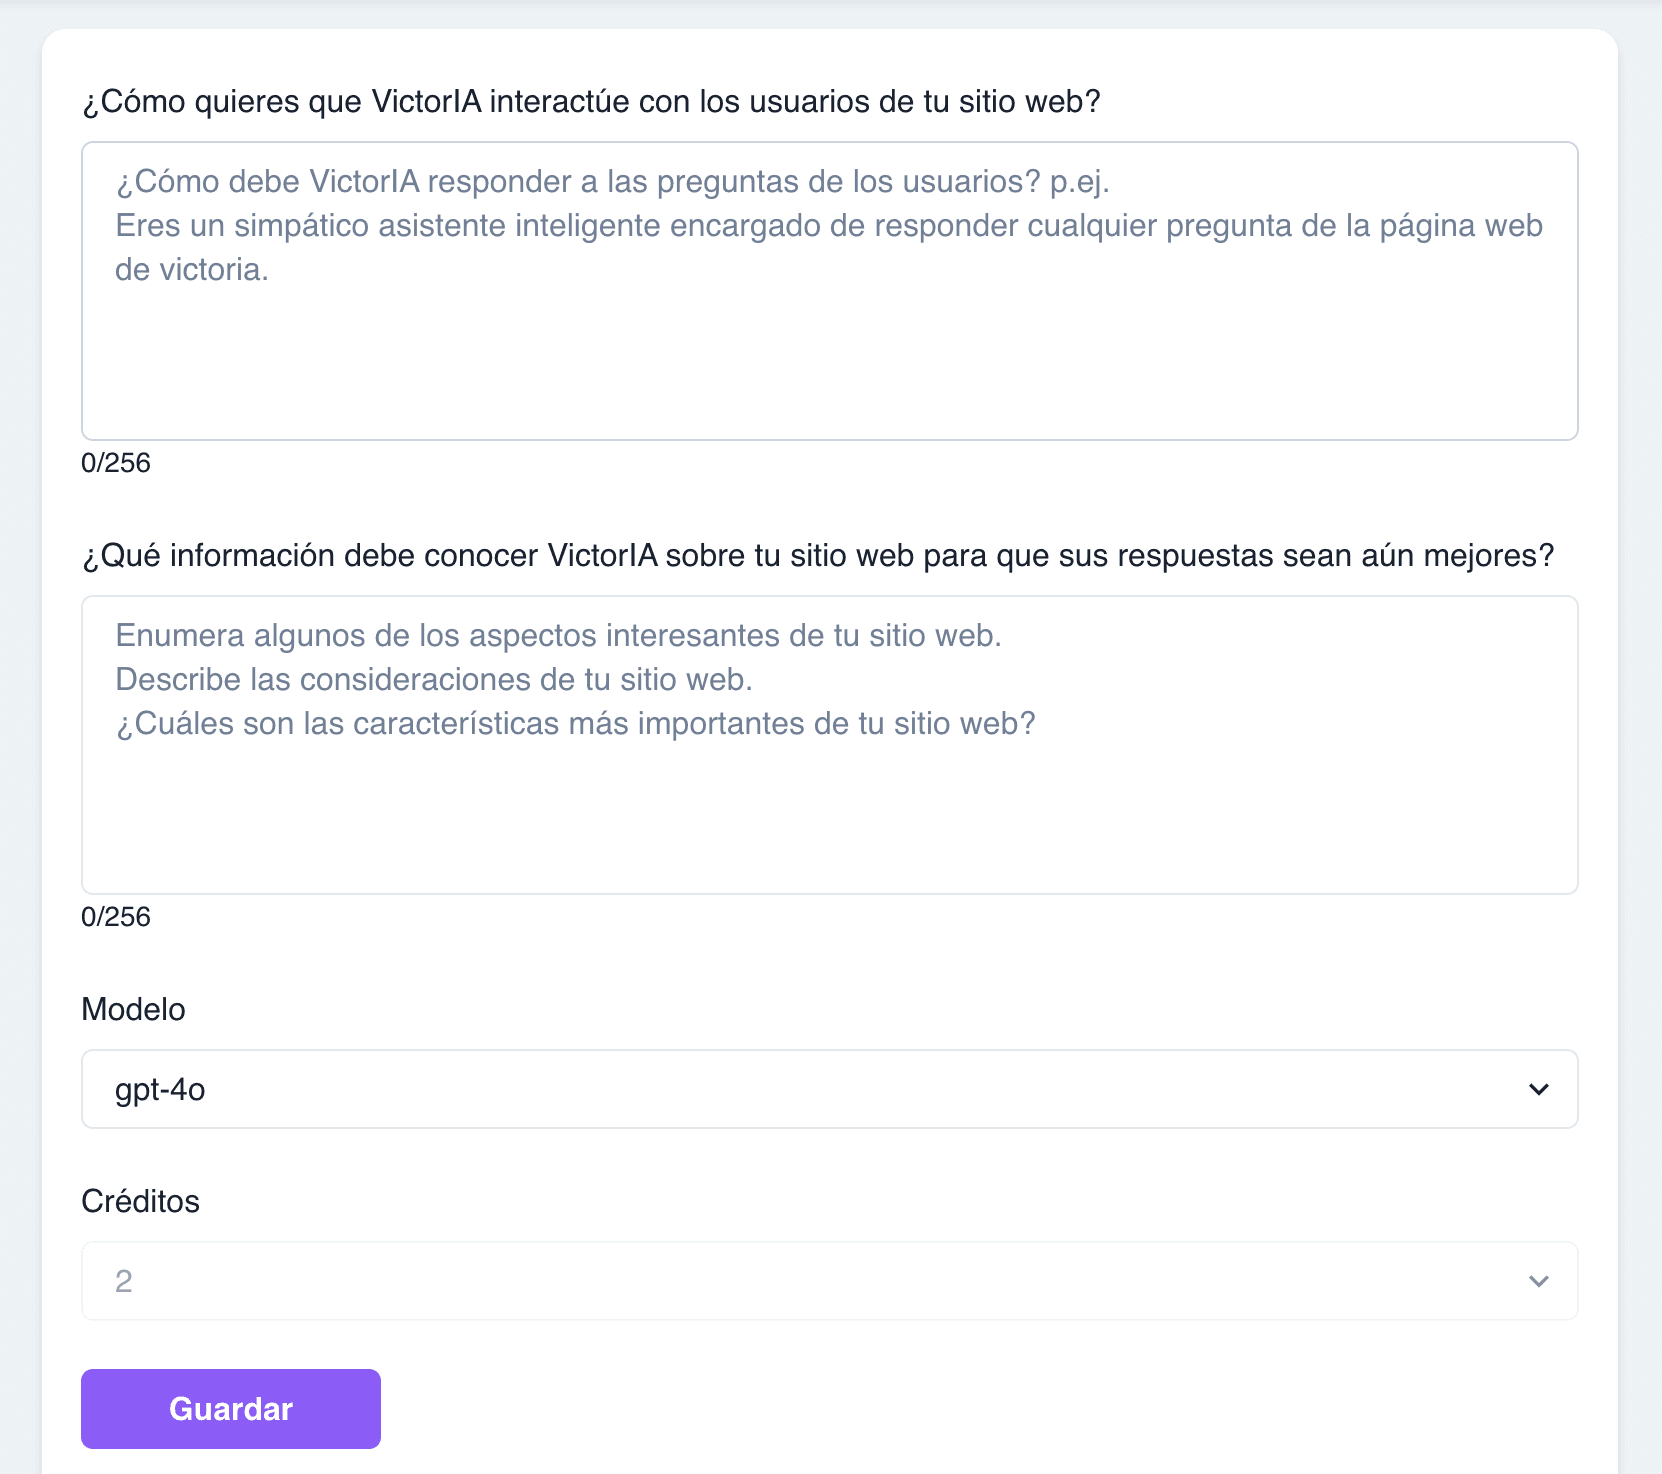
Configure your model
Every chatbot needs an AI model and instructions to guide it in responding to user questions. These steps are performed in the Workshop section.
First, specify how you want your assistant to interact with users on your website. You can define its tone, language, or style. This is crucial for creating a consistent user experience and ensuring the chatbot aligns with your brand or product. Clear instructions are essential to ensure the assistant responds appropriately. For example, for a boat reservation website, you could use:
You are a friendly and intelligent assistant responsible for answering questions on the X website about boat excursions. Be kind and use a professional yet fun tone when responding to questions.
You can even include specific aspects of your brand or product to enhance the chatbot's responses. However, this step is optional and can be left blank if not applicable.
Finally, choose one of the four AI models currently offered. In general, gpt-4o provides the best performance in terms of quality/price ratio. It's especially useful when working with a large number of documents in the project. On the other hand, gpt-3.5-turbo is the cheapest option but offers the lowest performance. It loses context, meaning it performs worse with many documents. gpt-4o-mini is a good alternative to gpt-3.5-turbo. Its performance is much better and costs the same. Lastly, gpt-4-turbo is the most expensive model, although it doesn't outperform gpt-4o. It's also useful when managing many documents.
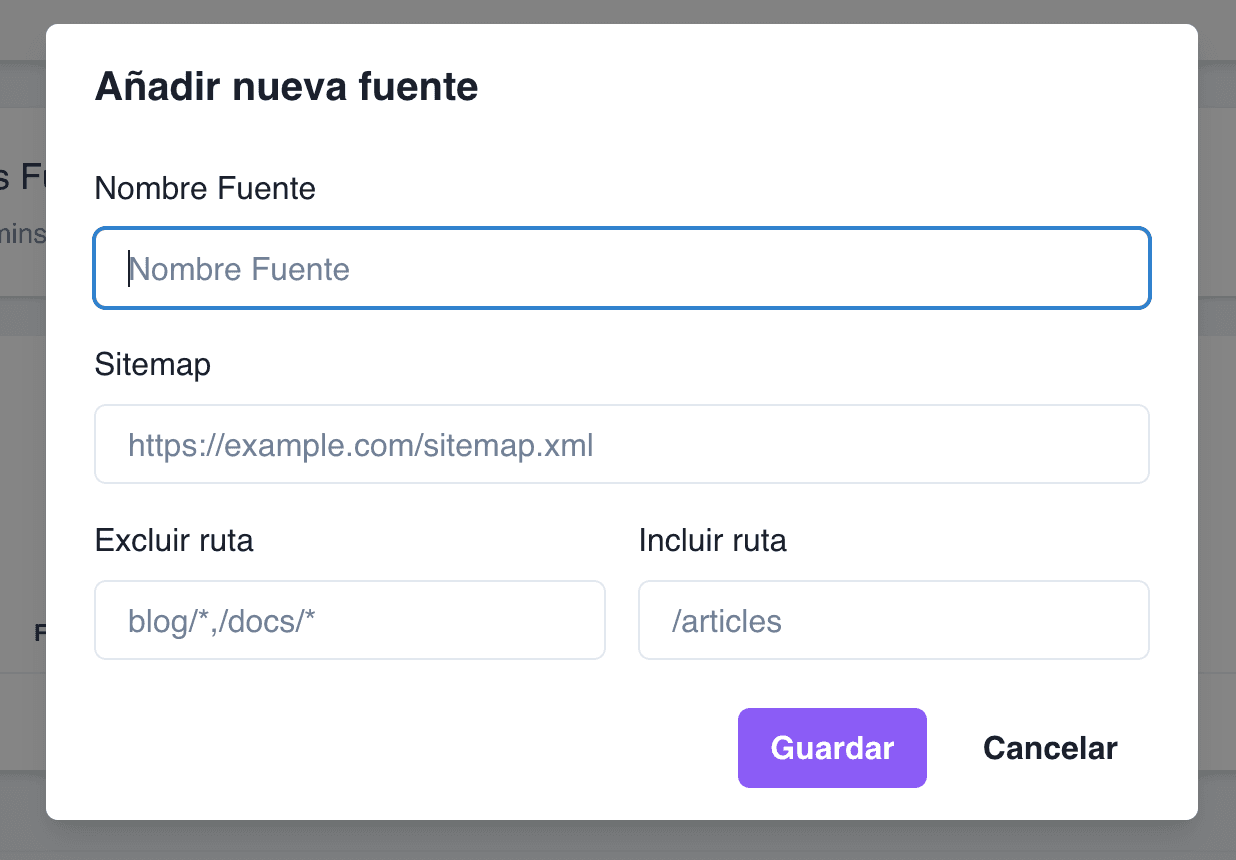
Add your data sources
From the Data Sources section within a project, VictorIA offers various options for quickly and easily connecting your business data to your chatbot. Here is the current list of connectors:
- Sitemap
- Web Pages
- Files (.pdf, .txt)
The sitemap option is particularly useful when you want to scan all the pages of a website instantly. The site must have a configured sitemap.xml file, which is used to gather all the website's URLs. Note that you can filter to include or exclude routes. For example, you could add the filter "/blog" to exclude blog pages from your website.
Alternatively, you can also add specific web pages. This is especially useful when you don't want to include an entire website and are only interested in specific page content. Simply add one or more URLs (separated by commas with no spaces), and VictorIA will scan and include the page content as part of the chatbot's knowledge base. It's that simple.
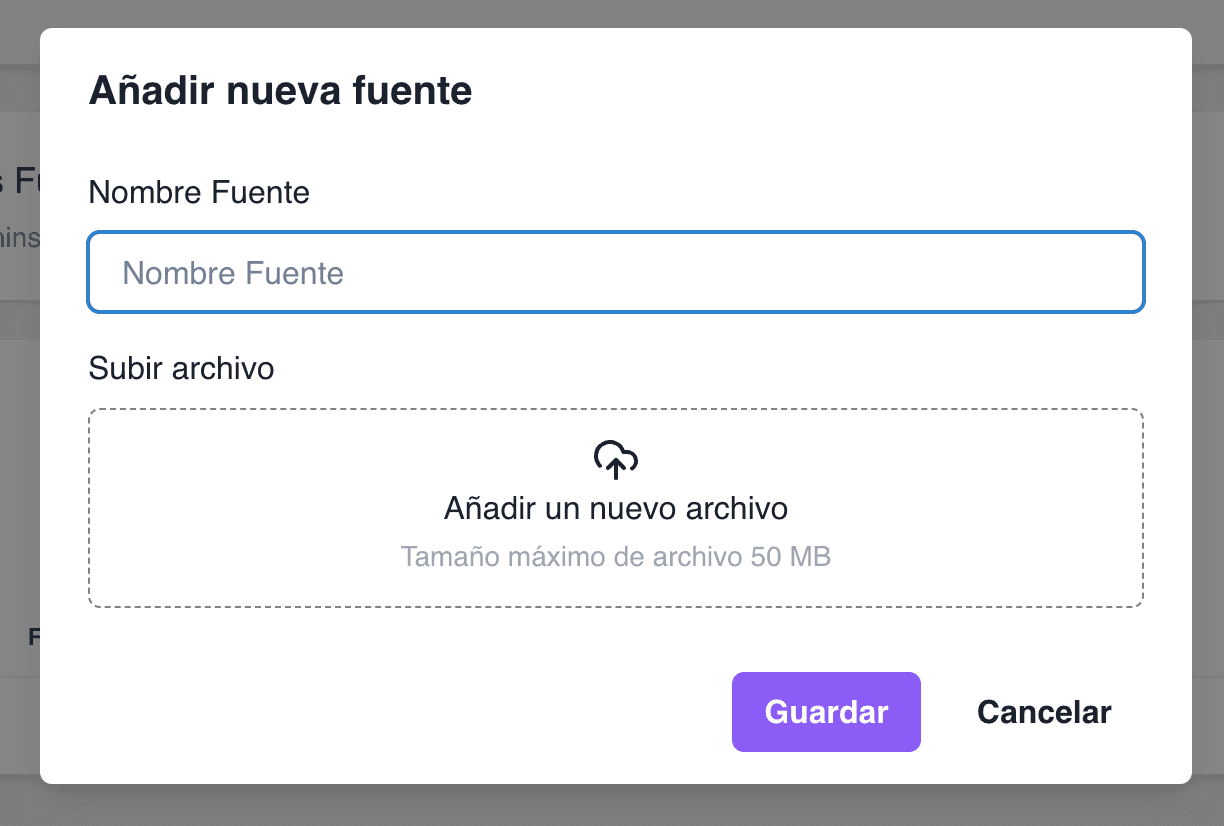
You can also upload files from your device in .pdf or .txt format. This is particularly useful when the content isn't published online but exists as internal documentation that can be shared. Select the file from your local directory, and its content will automatically be included in the knowledge base.
If none of these options suit your use case and you need us to create a new one for you, contact us, and we'd be happy to work on providing a solution.
Test your chatbot
From the Home section of the project, you'll find the VictorIA component connected to your business data in the bottom-right corner. Use it to run any tests you need. Prepare a set of representative questions and ensure the results meet your expectations. The sample questions should either come from real users or be designed to ensure the included data sources are appropriate.
Troubleshooting
Sometimes, the chatbot may produce unexpected answers. Here are some common issues and suggestions for resolving them:
- The chatbot can't find information for the questions I ask. There are two possible reasons: an error occurred while adding your business context, or the question isn't relevant. The first issue can be quickly identified if any data sources show a status other than completed. Alternatively, the question may not relate to any of the provided sources, which is why the chatbot cannot provide an answer.
- Hallucinations or inaccurate responses. Pay close attention to the content you provide to the chatbot. It's better to use self-contained, structured, and preferably concise documents rather than long, disorganized ones with unrelated topics. Additionally, using enriched text with titles, subtitles, lists, bold, italics, etc., rather than plain text, improves response quality. In short, the format and clarity of the content are key to the chatbot's accuracy.
- Responses are not entirely correct. This can result from the content of the documents or improper model configuration. While the former is harder to test, quicker fixes include switching to a different AI model or adjusting the instructions. The instructions should always be clear and directly related to the use case you're addressing.
Deployment
After configuring and testing your chatbot to ensure it behaves as expected, you're ready to proceed with integration. Here's how to add a chatbot to your website and connect it to your project configuration.
CRMs and other websites
VictorIA provides a ready-to-use component for any CRM or website, such as WordPress, PrestaShop, Joomla, Drupal, etc. All you need to do is add the following code snippet to your project's footer.html file, and voila! You'll have an intelligent assistant running on your website. But first, copy the value of your API KEY from the Home section of your project and replace the API_KEY placeholder in the component's code. This step is crucial, as it connects your project with VictorIA. The rest of the options are for customizing the chatbot to fit your website and brand. If you encounter any issues, feel free to contact us.
<script src="https://www.unpkg.com/@victoriabot/chat"></script><script> VictorIA.initChatbot({ apiKey: "API_KEY", chatbotTitle: "<chatbot title>", chatbotSubtitle: "<chatbot subtitle>", welcomeMessage: "<welcome message>", style: { backgroundColor: "<chatbot background color>", assistantIcon: "<assistant icon URL>", buttonIcon: "<button icon URL>", buttonColor: "<button color>", buttonColorHover: "<button hover color>" } });</script>Custom websites
If you have a website developed with React, use the component we've designed for this framework, which can be installed via npm or your preferred package manager. Then, copy the following snippet and add it to your code. Don't forget to use your project's API KEY to apply its configuration and add the rest of the options to align the chatbot with your website and brand. Integrating an intelligent assistant into your website with VictorIA is that simple.
import { VictorIABot } from '@victoriabot/chat';
<VictorIABot  apiKey={API_KEY}  chatbotTitle="<chatbot title>"  chatbotSubtitle="<chatbot subtitle>"  welcomeMessage="<welcome message>"  style={{    backgroundColor: "<button color>",    assistantIcon: "<assistant icon URL>",    buttonIcon: "<button icon URL>",    buttonColor: "<button color>",    buttonColorHover: "<button hover color>"  }}/>